Showing posts with label Daring Bakers Challenge. Show all posts

Tuesday, March 30, 2010

Orange Tian - The Daring Bakers Challenge

The 2010 March Daring Baker’s challenge was hosted by Jennifer of Chocolate Shavings. She chose Orange Tian as the challenge for this month, a dessert based on a recipe from Alain Ducasse’s Cooking School in Paris.

Note: There are quite a few steps to making this dessert; however a lot of them can be made in advance. The orange marmalade can be made several days ahead of time and the caramel sauce and orange segments preparation should be made the day before you make the dessert. Also, if you have a scale, try and use the weighed measurements as they will be the most accurate.

For the Pate Sablee:
Ingredients U.S. Imperial Metric Instructions for Ingredients
2 medium-sized egg yolks at room temperature
granulated sugar 6 tablespoons + 1 teaspoon; 2.8 oz; 80 grams
vanilla extract ½ teaspoon
Unsalted butter ¼ cup + 3 tablespoons; 3.5 oz; 100 grams ice cold, cubed
Salt 1/3 teaspoon; 2 grams
All-purpose flour 1.5 cup + 2 tablespoons; 7 oz; 200 grams
baking powder 1 teaspoon; 4 grams
Directions:
Put the flour, baking powder, ice cold cubed butter and salt in a food processor fitted with a steel blade.
In a separate bowl, add the eggs yolks, vanilla extract and sugar and beat with a whisk until the mixture is pale. Pour the egg mixture in the food processor.
Process until the dough just comes together. If you find that the dough is still a little too crumbly to come together, add a couple drops of water and process again to form a homogenous ball of dough. Form into a disc, cover with plastic wrap and leave to rest in the fridge for 30 minutes.
Preheat your oven to 350 degree Fahrenheit.
Roll out the dough onto a lightly floured surface until you obtain a ¼ inch thick circle.
Using your cookie cutter, cut out circles of dough and place on a parchment (or silicone) lined baking sheet. Bake for 20 minutes or until the circles of dough are just golden.

For the Marmalade: (I used my own home made with has oranges, grapefruit, tangerine, and lemon with some slices of citrus segment. I don’t use pectin; I use the old method of cooking until it thickens…

For the Orange Segments:
For this step you will need 8 oranges.
Cut the oranges into segments over a shallow bowl and make sure to keep the juice. Add the segments to the bowl with the juice.
[See YouTube video in the References section below for additional information on segmenting oranges.]

For the Caramel:
Ingredients U.S. Metric Imperial Instructions for Ingredients
granulated sugar 1 cup; 7 oz; 200 grams
orange juice 1.5 cups + 2 tablespoons; 14 oz; 400 grams
Place the sugar in a pan on medium heat and begin heating it.
Once the sugar starts to bubble and foam, slowly add the orange juice. As soon as the mixture starts boiling, remove from the heat and pour half of the mixture over the orange segments.
Reserve the other half of the caramel mixture in a small bowl — you will use this later to spoon over the finished dessert. When the dessert is assembled and setting in the freezer, heat the kept caramel sauce in a small saucepan over low heat until it thickens and just coats the back of a spoon (about 10 minutes). You can then spoon it over the Orange Tian

For the Whipped Cream

Ingredients U.S. Metric Imperial Instructions for Ingredients
heavy whipping cream 1 cup; 7 oz; 200 grams
3 tablespoons of hot water
1 tsp Gelatine
1 tablespoon of confectioner's sugar
orange marmalade (see recipe above) 1 tablespoon
In a small bowl, add the gelatine and hot water, stirring well until the gelatine dissolves. Let the gelatine cool to room temperature while you make the whipped cream. Combine the cream in a chilled mixing bowl. Whip the cream using a hand mixer on low speed until the cream starts to thicken for about one minute. Add the confectioner sugar. Increase the speed to medium-high. Whip the cream until the beaters leave visible (but not lasting) trails in the cream, then add the cooled gelatine slowly while beating continuously. Continue whipping until the cream is light and fluffy and forms soft peaks. Transfer the whipped cream to a bowl and fold in the orange marmalade.
[Tip: Use an ice cold bowl to make the whipped cream in. You can do this by putting your mixing bowl, cream and beater in the fridge for 20 minutes prior to whipping the cream.]

Assembling the Dessert:
Make sure you have some room in your freezer. Ideally, you should be able to fit a small baking sheet or tray of desserts to set in the freezer.
Line a small tray or baking sheet with parchment paper or a silicone sheet. Lay out 6 cookie cutters onto the parchment paper/silicone.
Drain the orange segments on a kitchen towel.
Have the marmalade, whipped cream and baked circles of dough ready to use.
Arrange the orange segments at the bottom of each cookie cutter. Make sure the segments all touch either and that there are no gaps. Make sure they fit snugly and look pretty as they will end up being the top of the dessert. Arrange them as you would sliced apples when making an apple tart.
Once you have neatly arranged one layer of orange segments at the bottom of each cookie cutter, add a couple spoonfuls of whipped cream and gently spread it so that it fills the cookie cutter in an even layer. Leave about 1/4 inch at the top so there is room for dough circle.
Using a butter knife or small spoon, spread a small even layer of orange marmalade on each circle of dough.
Carefully place a circle of dough over each ring (the side of dough covered in marmalade should be the side touching the whipping cream). Gently press on the circle of dough to make sure the dessert is compact.
Place the desserts to set in the freezer to set for 10 minutes.
Using a small knife, gently go around the edges of the cookie cutter to make sure the dessert will be easy to unmold. Gently place your serving plate on top of a dessert (on top of the circle of dough) and turn the plate over. Gently remove the cookie cutter, add a spoonful of caramel sauce and serve immediately.


To be honest this is not the flavour I wanted to use for this tart... I wanted to try Mango and Peach, toping and mango peach homemade jam .
Also an appetizer tart combines home made mascrapone cheese with Lebanese fig jam, and fresh figs topping...and drizzled with aged balsamic vinegar .

I was very sick the last couple of days, I had a bad sinus infection, all my face with hurting.
I couldn't do much . But keep checking I am going to prepare the new flavours soon, and post them as part two of the challenge.


French Vegetable Tian


Provençal cooking celebrates the earthy traditions of the French countryside and southern France in general, with food as simple and good as bread, wine, cheese. A Tian is a layered, baked vegetable dish that originated in Provence but is also common to city kitchens. The vegetable Tian is a savoury dish to complement the sweet dish for the March Challenge.


Unlike a gratin, a Tian does not include a dough, bread crumbs or cheese, which allows the juices in the vegetables to evaporate in the oven's dry heat, concentrating their flavours.


Summer Vegetable Tian


This recipe calls for aubergines (eggplants). Look for glossy, brightly coloured skins (eggplant with overly dark flesh tends to be bitter). As with many rustic recipes, ingredients are called for by size and quantity but not a measured amount. Try not to worry: If you use the sizes and quantities below, you should have the right amount.


2 medium leeks
4 medium cloves garlic (the recipe calls for 2 cloves)
1 or 2 small zucchini
1 or 2 small aubergines (eggplants)
2 or 3 medium plum tomatoes
2 or 3 sprigs fresh thyme (I used 1 tbsp Herb De Provence)
1/4 cup dry white wine (you can use water or vegetable stock-wine gives the acid flavour)
Extra virgin olive oil
Butter (I didn’t use butter, instead I brush the veggies with olive oil)
Sea salt
Freshly ground black pepper


1. cut a piece of parchment paper to the size of a two-quart glass or ceramic baking dish. Set aside. Butter the inside of the dish and set aside. Preheat the oven to 375 degrees.

2. Remove the root ends of the leeks and cut the leeks just where the white part meets the green top. Set the greens aside for another use (such as making stock). Slice the white leek segments in half lengthwise and halve each. Slice leek quarters crosswise into ribbons; scrape into a bowl and fill the bowl with water. Swirl the leeks around until they start to separate and release the grit between the layers. Repeat with one or two changes of water to remove all the grit. Once the leeks are clean, drain them in a colander.

3. While the leeks are draining, peel and mince garlic.

4. Remove the ends from the zucchini and aubergines and discard. Cut each crosswise into coins 1/8-inch thick.

5. Remove the stem ends from the tomatoes and discard. Cut each crosswise into rounds 1/8-inch thick.

6. Coat a small pan with a two-count of olive oil and heat until shimmering. Add the garlic and swirl to coat. Gently add the leeks, avoiding splashing. Cook, stirring frequently, until the leeks have begun to soften and the garlic has released its fragrance, approximately two minutes.

7. Carefully spread the leek-garlic mixture across the bottom of the baking dish. Sprinkle with salt and a few grindings of fresh black pepper; strip the leaves from one of the sprigs of thyme and sprinkle over the mixture.

8. Layer the zucchini, aubergines and tomato on top of the leek-garlic mixture, alternating each and overlapping slightly. If working with a square or rectangular dish, layer in rows; if working with a circular or oval dish, work in fans from the center. Drizzle with a two-count of olive oil and splash with the wine. Sprinkle with salt and a few grindings of fresh black pepper; strip the leaves from the remaining thyme and sprinkle over the casserole.

9. Butter the cut parchment and carefully place, buttered side down, on top of the vegetables. Bake for 35 to 45 minutes, depending on your oven, until the vegetables are soft but not mushy while the edges are nicely crisp and brown.


Note: use a pie plate and not metal the acid in the wine will ruin the metal part.
Use a tray with parchment paper to catch the spill out juice.
If you have a convection oven, adjust the setting to convection roast, 400F; otherwise raise the oven temp to 425F. With the pan in the bottom and the paper on top the dish needs a higher temperature to roast and not steam the veggies. The last ten minutes take the paper off and let the veggies roast and caramelize.


I highly recommend this dish, it smells amazing, and tastes soooo good. A healthy side dish with your chicken or roast dinner.


Sunday, February 28, 2010

TIH-RUH-MEE-SOO - The Daring Bakers Challenge


Tiramisu - Heaven in your mouth..
Also known as "Tuscan Trifle," the dessert was initially created in Siena, in the northwestern Italian province of Tuscany. The occasion was a visit by Grand Duke Cosimo de'Medici III, in whose honor the concoction was dubbed zuppa del duca (the "duke's soup"). The erstwhile duke brought the dessert back with him to Florence. In the 19th Century, zuppa del duca became popular among the English intellectuals and artists who lived there Consequently, it is also known as zuppa Inglese. They took the dessert to England, where its popularity grew. Zuppa del duca eventually made its way to Treviso, just northwest of Venice, in the northeastern province of Veneto.

The February 2010 Daring Bakers’ challenge was hosted by Aparna of My Diverse Kitchen and Deeba of Passionate About Baking. They chose Tiramisu as the challenge for the month. Their challenge recipe is based on recipes from The Washington Post, Cordon Bleu at Home and Baking Obsession.

THE CHALLENGE:

We have chosen Baltimore pastry chef Carminantonio Iannaccone’s version of tiramisu for a couple of reasons.

Firstly, his recipe is different from most other tiramisu recipes as he makes a zabaglione, an egg custard which is flavored with Marsala wine (you may use coffee instead). Even more important is that his zabaglione is cooked so there is no risk from using raw eggs.

He also makes a vanilla flavored pastry cream which we haven't seen in other tiramisu recipes.

While both of us do eat eggs, we do have a preference for desserts where the smell and taste do not come through. We found that the coffee in the recipe masked the eggs in adequately.

Just in case you would prefer to make an eggless tiramisu, we are including recipes in the Alternate Bakers section to make eggless ladyfinger biscuits and an eggless and alcohol-free tiramisu.

Note: There are also some links to other alternative recipes at the end of this post. Deeba has also provided step-by-step pictures where possible.

The recipes for this challenge are presented in the following order:

A. Tiramisu (includes zabaglione & vanilla pastry cream)
B. Mascarpone Cheese
C. Ladyfinger/ Savoiardi Biscuits

TIRAMSU

(Recipe source: Carminantonio's Tiramisu from


Ingredients:
For the zabaglione:
2 large egg yolks
3 tablespoons sugar/50gms
1/4 cup/60ml Marsala wine (or port or coffee)
1/4 teaspoon/ 1.25ml vanilla extract
1/2 teaspoon finely grated lemon zest

For the vanilla pastry cream:
1/4 cup/55gms sugar
1 tablespoon/8gms all purpose flour
1/2 teaspoon finely grated lemon zest
1/2 teaspoon/ 2.5ml vanilla extract
1 large egg yolk
3/4 cup/175ml whole milk


For the whipped cream:
1 cup/235ml chilled heavy cream (we used 25%)
1/4 cup/55gms sugar
1/2 teaspoon/ 2.5ml vanilla extract


To assemble the tiramisu:
2 cups/470ml brewed espresso, warmed
1 teaspoon/5ml rum extract (optional)
1/2 cup/110gms sugar
1/3 cup/75gms mascarpone cheese
36 savoiardi/ ladyfinger biscuits (you may use less)
2 tablespoons/30gms unsweetened cocoa powder

Method:
For the zabaglione:
Heat water in a double boiler. If you don’t have a double boiler, place a pot with about an inch of water in it on the stove. Place a heat-proof bowl in the pot making sure the bottom does not touch the water.
In a large mixing bowl (or stainless steel mixing bowl), mix together the egg yolks, sugar, the Marsala (or espresso/ coffee), vanilla extract and lemon zest. Whisk together until the yolks are fully blended and the mixture looks smooth.
Transfer the mixture to the top of a double boiler or place your bowl over the pan/ pot with simmering water. Cook the egg mixture over low heat, stirring constantly, for about 8 minutes or until it resembles thick custard. It may bubble a bit as it reaches that consistency.
Let cool to room temperature and transfer the zabaglione to a bowl. Cover and refrigerate at least 4 hours or overnight, until thoroughly chilled.


For the pastry cream:
Mix together the sugar, flour, lemon zest and vanilla extract in a medium heavy-bottomed saucepan. To this add the egg yolk and half the milk. Whisk until smooth.
Now place the saucepan over low heat and cook, stirring constantly to prevent the mixture from curdling.
Add the remaining milk a little at a time, still stirring constantly. After about 12 minutes the mixture will be thick, free of lumps and beginning to bubble. (If you have a few lumps, don’t worry. You can push the cream through a fine-mesh strainer.)
Transfer the pastry cream to a bowl and cool to room temperature. Cover with plastic film and refrigerate at least 4 hours or overnight, until thoroughly chilled.


For the whipped cream:
Combine the cream, sugar and vanilla extract in a mixing bowl. Beat with an electric hand mixer or immersion blender until the mixture holds stiff peaks. Set aside.


To assemble the tiramisu:
Have ready a rectangular serving dish (about 8" by 8" should do) or one of your choice.
Mix together the warm espresso, rum extract and sugar in a shallow dish, whisking to mix well. Set aside to cool.
In a large bowl, beat the mascarpone cheese with a spoon to break down the lumps and make it smooth. This will make it easier to fold. Add the prepared and chilled zabaglione and pastry cream, blending until just combined. Gently fold in the whipped cream. Set this cream mixture aside.


Now to start assembling the tiramisu.
Workings quickly, dip 12 of the ladyfingers in the sweetened espresso, about 1 second per side. They should be moist but not soggy. Immediately transfer each ladyfinger to the platter, placing them side by side in a single row. You may break a lady finger into two, if necessary, to ensure the base of your dish is completely covered.
Spoon one-third of the cream mixture on top of the ladyfingers, then use a rubber spatula or spreading knife to cover the top evenly, all the way to the edges.
Repeat to create 2 more layers, using 12 ladyfingers and the cream mixture for each layer. Clean any spilled cream mixture; cover carefully with plastic wrap and refrigerate the tiramisu overnight.
To serve, carefully remove the plastic wrap and sprinkle the tiramisu with cocoa powder using a fine-mesh strainer or decorate as you please. Cut into individual portions and serve.


Usually my Tiramisu Recipe is lighter than this version. I buy the Italian Lady Fingers, it was on my to do list to try the home made version... Thanks very much Deeba and Aprana for giving me the chance to do prepare everything from scratch. Thanks for choosing a delicious dessert recipe.. The flavours are divine...

For the coffee mix I added around 1/4 cup Kahlua liqueur to balance the coffee flavour.


P.S.: I lent my smaller springform pan to a friend, and end up using a square 9 x 9 springform pan. the cake came thinner than intended, only got two layers out of the lady fingers. A smaller pan will be better. Do try the cake its awesome in every bite... use an 8 inch pan or even a rectangular bread pan will do if you line the cake with plastic wrap to make it easy to lift the cake after.

Wednesday, January 27, 2010

The Winter Olympic Games are coming to BC - Nanaimo Bars Challenge

The January Daring Bakers Challenge was hosted by Lauren of Celiac Teen. Lauren Choose Gluten Free Graham Wafers and Nanaimo Bars for the challenge. She based her sources on 101 cookbook and http://www.nanaimo.ca/
It was a very nice challenge as I like to do everything from scratch..
though I didn't do the gluten free wafers, I used my own recipe for the wafers. Its an amazing recipe with wonderful flavour.
the Recipe for the Nanaimo Bars was overly sweet to my taste, and because it was a challenge I followed Lauren Recipe and not my own.


a mix of milk and semi sweet chocolate


Dark Chocolate for me


With open arms , we welcome every one to Canada


Homemade Graham Crackers:
1 1/2 cups all purpose flour
1 cup whole wheat flour
1/2 cup untoasted wheat germ
1/2 tsp salt
1 tsp baking soda
1 tsp ground cinnamon
1cup unsalted butter - melted
3/4 cup brown sugar
2 tbsp good quality honey
in a food processor mix well to combine. Divide into four sections, roll between parchment or plastic paper to 1/8 inch cut the cookies either with a pizza roller, or rectangular cookie cutter. Bake in preheat 350F oven for 8-10 minutes.

the best Graham Crackers Cookies you tasted. You will stop buying the store brand.
Makes around 877 gms.


if you use lots of flour like me, couple bay leaves between your flour is garuanteed to keep humidity or insects away

Sunday, December 6, 2009

Late Posting - Daring Bakers Challenge for November

Some of you were wondering where is she hiding....
I was very busy last month, preparing and baking for couple of Christmas Craft Shows in town and area, after the shows I packed my suitcase and went to Toronto, on a business trip, it was successful, fun and I got to meet many interesting people and attending couple of Craft & Food Shows, also did some shopping for ingredients I cannot find in my area.

Time goes so fast when you are having fun.... I enjoyed every minute of my visit.

The Daring Bakers challenge for November was hosted by my talented friend LisaMichelle of
www.parsley,sage,dessertsandlinedrive . Lisa choose Cannolo from the Lidia's cookbook "my Italian-American Kitchen" and the Soprano Family cookBook by Allen Rucker; recipes by Michelle Scicolone, as ingredient/direction guides. She added her own modifications/changes, so the recipe is not 100% verbatim from either book.

Lidisano’s Cannoli
Makes approximately 22-24 4-inch cannoli
Prep time:Dough – 2 hours and 10-20 minutes, including resting time, and depending on whether you do it by hand or machine.Filling – 5-10 minutes plus chilling time (about 2 hours or more)Frying – 1-2 minutes per cannoli Assemble – 20–30 minutes
UPDATE: I learned that the addition of a little freshly ground or instant coffee to the shell dough is traditional in Sicilian style cannoli and gives the shells more flavor. I suppose you can add it along with the cocoa or in lieu of it.

CANNOLI SHELLS
2 cups (250 grams/8.82 ounces) all-purpose flour
2 tablespoons(28 grams/1 ounce) sugar
1 teaspoon (5 grams/0.06 ounces) unsweetened baking cocoa powder
1/2 teaspoon (1.15 grams/0.04 ounces) ground cinnamon
1/2 teaspoon (approx. 3 grams/0.11 ounces) salt
3 tablespoons (42 grams/1.5 ounces) vegetable or olive oil
1 teaspoon (5 grams/0.18 ounces) white wine vinegar
Approximately 1/2 cup (approx. 59 grams/approx. 4 fluid ounces/approx. 125 ml) sweet Marsala or any white or red wine you have on hand
1 large egg, separated (you will need the egg white but not the yolk)
Vegetable or any neutral oil for frying – about 2 quarts (8 cups/approx. 2 litres)
1/2 cup (approx. 62 grams/2 ounces) toasted, chopped pistachio nuts, mini chocolate chips/grated chocolate and/or candied or plain zests, fruits etc.. for garnish confectioners’ sugar

Note – If you want a chocolate cannoli dough, substitute a few tablespoons of the flour (about 25%) with a few tablespoons of dark, unsweetened cocoa powder (Dutch process) and a little more wine until you have a workable dough (Thanks to Audax).

CANNOLI FILLING
2 lbs (approx. 3.5 cups/approx. 1 kg/32 ounces) ricotta cheese, drained
1 2/3 cups cup (160 grams/6 ounces) confectioner’s sugar, (more or less, depending on how sweet you want it), sifted
1/2 teaspoon (1.15 grams/0.04 ounces) ground cinnamon
1 teaspoon (4 grams/0.15 ounces) pure vanilla extract or the beans from one vanilla bean
3 tablespoons (approx. 28 grams/approx. 1 ounce) finely chopped good quality chocolate of your choice
2 tablespoons (12 grams/0.42 ounces) of finely chopped, candied orange peel, or the grated zest of one small to medium orange
3 tablespoons (23 grams/0.81 ounce) toasted, finely chopped pistachios

Note – If you want chocolate ricotta filling, add a few tablespoons of dark, unsweetened cocoa powder to the above recipe, and thin it out with a few drops of warm water if too thick to pipe.

I made the dough and let it rest till the second day...since I don't have a pasta machine , I rolled the dough by hand and cut it small . Made my own Cannoli molds using rolled thick foil paper, its worked well.
I made my own Ricotta Cheese, drained it well, then whipped it to make it smooth, added couple of spoons of sugar, and candied citron and the cinnamon. vanilla (excellent flavours)
for decoration I used candied cherries and ground pistachios...
used the same stuffing for the chocolate adding some chopped chocolates and decorated with chocolate sprinkles.


Two doughs and Homemade Ricotta taste always better
Cannoli stuffed with homemade Ricotta, Candied Citron and decorated with cherries and pistachios


Chocolate Cannoli for my husband


for more ideas and flavours check Lisa's blog and the Daring Bakers Bloggers

Thursday, October 29, 2009

October Daring Bakers Challenge - My first recipe challenge part I


According to some writings, the macaroon recipe appeared in the Middle East (Syria, Lebanon ..) in the 15Th century under the name "Louzieh"Derived from " Luz "which means almond.
Since the 12Th century, when Venice was the only Italian City to trade with the Levant, it allowed foreign merchant among them the Levantines and the Jews to reside near but not in the city and open warehouses and offices.

In the Middle Ages in Europe, The cookies made the first appearance in Venice, Italy. That's when the traffic is at its peak. Gradually, we discover foreign cuisine reported by browsers among which a small cake tender and crunchy which was called "maccheroni"Meaning" fine paste . It will "macaroon"In French.

The arrival of macaroons to France dated to the Renaissance (16Th & 17Th centuries) . Some
claims that the Italian Monastery joined by the pastry chefs of Catherine de Medici , wife of King Ate co II . Later, two Benedictine nuns, Sister Marguerite and Sister Marie-Elisabeth, came to Nancy seeking asylum during the French Revolution. The two women paid for their housing by baking and selling macaroon cookies, and thus became known as the "Macaroon Sisters." Recipes for macaroons (also spelled "mackaroon," "maccaroon" and "mackaroom") appear in recipe books at least as early as 1725 (Robert Smith's Court Cookery, or the Complete English Cook).
The 2009 October Daring Bakers’ challenge was brought to us by Ami S. She chose macarons from Claudia Fleming’s The Last Course: The Desserts of Gramercy Tavern as the challenge recipe.
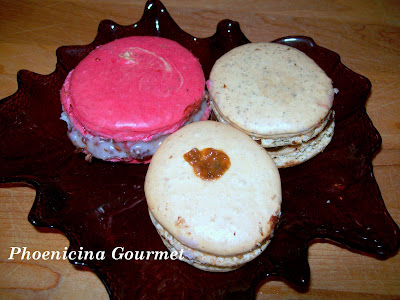
Unfortunately the recipe did not work with me, I tried it three times, I will leave you with the photos... I am not giving up... this is the spirit of the challenge is to keep trying and not giving up. At the moment I am testing some recipes for my coming Craft Shows.
Recipe :
Actual baking time: 12 minutes total, plus a few minutes to get your oven from 200°F to 375°F.
Equipment required:• Electric mixer, preferably a stand mixer with a whisk attachment•
Rubber spatula• Baking sheets• Parchment paper or nonstick liners• Pastry bag (can be disposable)• Plain half-inch pastry bag tip• Sifter or sieve• If you don’t have a pastry bag and/or tips, you can use a Ziploc bag with the corner snipped off• Oven• Cooling rack• Thin-bladed spatula for removing the macaroons from the baking sheets• Food processor or nut grinder, if grinding your own nuts (ouch!)

Ingredients
Confectioners’ (Icing) sugar: 2 ¼ cups (225 g, 8 oz.)
Almond flour: 2 cups (190 g, 6.7 oz.)
Granulated sugar: 2 tablespoons (25 g , .88 oz.)
Egg whites: 5 (Have at room temperature)
Directions:
1. Preheat the oven to 200°F (93°C). Combine the confectioners’ sugar and almond flour in a medium bowl. If grinding your own nuts, combine nuts and a cup of confectioners’ sugar in the bowl of a food processor and grind until nuts are very fine and powdery.2. Beat the egg whites in the clean dry bowl of a stand mixer until they hold soft peaks. Slowly add the granulated sugar and beat until the mixture holds stiff peaks.3. Sift a third of the almond flour mixture into the meringue and fold gently to combine. If you are planning on adding zest or other flavorings to the batter, now is the time. Sift in the remaining almond flour in two batches. Be gentle! Don’t overfold, but fully incorporate your ingredients.4. Spoon the mixture into a pastry bag fitted with a plain half-inch tip (Ateco #806). You can also use a Ziploc bag with a corner cut off. It’s easiest to fill your bag if you stand it up in a tall glass and fold the top down before spooning in the batter.5. Pipe one-inch-sized (2.5 cm) mounds of batter onto baking sheets lined with nonstick liners (or parchment paper).6. Bake the macaroon for 5 minutes. Remove the pan from the oven and raise the temperature to 375°F (190°C). Once the oven is up to temperature, put the pans back in the oven and bake for an additional 7 to 8 minutes, or lightly colored.7. Cool on a rack before filling.
First Batch

Second Batch


second batch


the third


what is saved from the first batch, the taste is very good but I am not proud of the results.


My first Macaroon recipe was from Tartellet's


Happy Macaroon's Day... Thanks Amy.

Wednesday, October 7, 2009

Two new Cooking Challenges in September - New Electric Meter and a damaged computer

Hello every one.... I bet you were wondering where I was hiding all this time...and not posting anything since three weeks. I am sorry I was not able to post any of my recipes, I had lots to share, and many photos of all my summer baking, canning and preserves. My computer broke down couple of weeks ago.
When I was cooking Lebanese pumpkin jam recipe for the market, an employee from the City came knocking at my door telling me that they are working outside and changing the electric meters in the area. I asked him if he can wait couple of minutes till I finish what I am doing as I cannot leave my jam and go and shut down all the electric equipment, and he assured me that this will take minutes and nothing will happen. I didn't bother go downstairs to the office to shut the computer or the stove and kept stirring my jam. The microwave bulb was burned and this is not a big deal, as I have another unit... but when I went downstairs to check on the computer I couldn't restart it again, I panic, because my husband files and programs are all saved in the computer .

The computer was sent for repairs to save Michel's files and programs, and hoping to save my photos and my cook book. The technician managed to save the programs and all the documents, and some of my photos only. I lost many files and photos….

The daring baker challenge for Sept was hosted by Steph from a Whisk and a Spoon, she choose Michel Richard Puff Pastry dough – from the book “Baking with Julia” for Dorie Greenspan.
Since I used and enjoyed baking my puff pastry…. I saved all the scratch pieces for a rainy day when I need to prepare something quick and tasty , they will come handy. I didn’t know that they will end up my life-savour to prepare another remake for the challenge and platter of tasty appetizers
Caramelized Onions and Roasted Chicken - Roasted Chicken mixed with Mhamarah Dip
Wild Mushroom Mix - Feta , Kalamata Olive and Mhamarah Dip (Roasted Red Pepper and
Walnut Dip)

Mushroom , Green Onion and Green Pepper mix - Feta, Kalamata Olives and Mhamarah (this came as a test , the flavour was excellent)

Caramelized Onions and Roasted Chicken - Roasted chicken and Mhamara Dip


puff pastry dough - Chicken Onion mix - Mushroom Mix and Mhamara Dip


1- Caramalized Onions & Roasted Chicken Filling:
roast the chicken in the oven, caramalized the onions till they are golden brown then slice the chicken and add it to the onions with some chicken stock, sumac, pomagranate molasses, cumin, hot sauce, and walnut mix to combine well.
2- Wild Mushroom & Green Pepper Filling:(veggan)
cook the mushroom with couple spoons of olive oil , clean the green pepper and chop them the same size, clean green onions and chop them add them to the fried mushrooms, thym, black pepper, salt, minced garlic, marjoram, and jalapeno pepper, cook and mix well .
3- Roasted Red Pepper , Feta and Black Olive Filling:
I had some Roasted Pepper Dip (Mhamarah) I mixed some feta and black kalamata olive . The flavour was excellent
4- Roasted Red Pepper & Chicken Filling:
I save some of the roasted chicken and mixed it with the roasted pepper dip and made a nice filling.

Tuesday, July 28, 2009

It's cookie time - July Daring Bakers Challenge

This was a true fun challenge, when you get to play with your food, if you have children , this will be a nice project to do with them... what can be better than digging your fingers in chocolates,
and licking them one by one...... of course the Mallow Cookies...

The July Daring Bakers' challenge was hosted by Nicole at Sweet Tooth. She chose Chocolate Covered Marshmallow Cookies and Milan Cookies from pastry chef Gale Gand of the Food Network.

Mallows(Chocolate Covered Marshmallow Cookies)

Prep Time: 10 min
Inactive Prep Time: 5 min
Cook Time: 10 min
Serves: about 2 dozen cookies

Ingredients:
• 3 cups (375grams/13.23oz) all purpose flour
• 1/2 cup (112.5grams/3.97oz) white sugar
• 1/2 teaspoon salt
• 3/4 teaspoon baking powder
• 3/8 teaspoon baking soda
• 1/2 teaspoon ground cinnamon• 12 tablespoons (170grams/ 6 oz) unsalted butter
3 eggs, whisked together
• Homemade marshmallows, recipe follows
• Chocolate glaze, recipe follows

1. In a mixer with the paddle attachment, blend the dry ingredients.
2. On low speed, add the butter and mix until sandy.
3. Add the eggs and mix until combine.
4. Form the dough into a disk, wrap with clingfilm or parchment and refrigerate at least 1 hour and up to 3 days.
5. When ready to bake, grease a cookie sheet or line it with parchment paper or a silicon mat.
6. Preheat the oven to 375 degrees F.
7. Roll out the dough to 1/8-inch thickness, on a lightly floured surface. Use a 1 to 1 1/2 inches cookie cutter to cut out small rounds of dough.
8. Transfer to the prepared pan and bake for 10 minutes or until light golden brown. Let cool to room temperature.
9. Pipe a “kiss” of marshmallow onto each cookie. Let set at room temperature for 2 hours.
10. Line a cookie sheet with parchment or silicon mat.
11. One at a time, gently drop the marshmallow-topped cookies into the hot chocolate glaze.
12. Lift out with a fork and let excess chocolate drip back into the bowl.
13. Place on the prepared pan and let set at room temperature until the coating is firm, about 1 to 2 hours.
Note: if you don’t want to make your own marshmallows, you can cut a large marshmallow in half and place on the cookie base. Heat in a preheated 350-degree oven to slump the marshmallow slightly, it will expand and brown a little. Let cool, then proceed with the chocolate dipping.

Homemade marshmallows:
• 1/4 cup water
• 1/4 cup light corn syrup
• 3/4 cup (168.76 grams/5.95oz) sugar
• 1 tablespoon powdered gelatin
• 2 tablespoons cold water
• 2 egg whites , room temperature
• 1/4 teaspoon pure vanilla extract
1. In a saucepan, combine the water, corn syrup, and sugar, bring to a boil until “soft-ball” stage, or 235 degrees on a candy thermometer.
2. Sprinkle the gelatin over the cold water and let dissolve.
3. Remove the syrup from the heat, add the gelatin, and mix.
4. Whip the whites until soft peaks form and pour the syrup into the whites.
5. Add the vanilla and continue whipping until stiff.
6. Transfer to a pastry bag.

Chocolate glaze:
• 12 ounces semisweet chocolate
2 ounces cocoa butter or vegetable oil
1. Melt the 2 ingredients together in the top of a double boiler or a bowl set over barely simmering water. Milan Cookies Recipe courtesy Gale Gand, from Food Network website

I doubled the recipe as I wanted to experiment with different flavours...
My husband told me that he used to eat them stuffed with strawberry jam...
To be honest with you, I never tasted these cookies before and its was all new flavours to me..

1- For the first flavour I used peanut butter with chopped roasted caramel peanuts, mixed together , then covered the top of the cookies... then I added the marshmallows, which was very tricky to use when it was warm, it melted the peanut butter and both started to drip , I had to redo couple of cookies.... after the stuffing cooled completely I dipped them in dark and semi sweet chocolate then topped them with Roasted Peanuts.

2 - the second flavour I made chocolate ganache and added some mint liqueur to it to get the chocolate mint flavour, I wanted to add the mint to the marshmallow but I wasn't sure if it will be easy , so I choose to use it in the chocolate instead... after the chocolate set in the freezer for a while, I added the marshmallows and let it cool before dipping them in semi sweet and milk chocolates....

3- I still have another batch of cookies in the freezer, I want to try the Dulce DE Leche flavour with the marshmallow , and maybe some with strawberry jam...
I am running out of time and my husband is waiting for me to clean the chocolate bowl (upppppssssss) I cannot keep him waiting all night....

Sorry I cannot show you the inside.. the chocolate is still warm ..................but we couldn't wait any longer, its 11.00 pm, but we had to try one and another and another before the chocolate set...who cares if its messy.........

its good and its fun, and I wish I have more time to play with my food......but I do two farmer's markets and I take private orders.... I will try to prepare the other batch soon and share with you ...Promise.


Monday, June 29, 2009

Bakewell Tart - June Daring Bakers Challenge


A customer at the North Bay Farmer’s Market gave me two frozen bags of Sour Cherries, she said use them in your baking, also they make good jam. She will have fresh fruits soon, and if I need more she can pick me fresh ones when they are ready.

Sour Cherry is not a popular fruit in Lebanon, I know that we use the nut inside the seeds for our baking, and it’s called Mahleb, and it’s available in all Lebanese/Middle Eastern Stores.

I wanted to make some jam using the frozen sour cherries, and I searched to net to find 1) an easy way to take the seeds 2) a good recipe for jam without using pectin which we don’t use.
I found a simple way by cooking the cherries for 10-15 minutes then mash them or use a hand mouline to mash the fruit and get rid of the seeds. The result was a red syrupy paste. My first choice was using Quince to the mixture first to add a texture and get the nature pectin but quince is not available in the markets in North Bay, so my second choice went to the green pears, which is almost similar to quince and they do keep their shapes and taste excellent in jams and have pectin. And my two frozen bags turned to exotic jam with beautiful flavour, I added freshly ground cloves, nutmeg and fennel seeds in the mix

I wanted to make some pies for the market, and since the challenge of June was the Bakewell Tart, this became my first choice, and on Friday morning
I prepared enough dough to make 20 - 4 inch pies and 20 - 8 inch pies.
A dozen of each size was made using the Bakewell Tart recipe, and since I made enough frangipane to made fresh fruit tarts with frangipane paste.

There are two types of Bakewell Tart. The first is the “pudding” where a layer of jam is covered by an almondy pastry cream and baked in puff pastry. The second is the “tart” where a rich Shortcrust pastry holds jam and an almondy sponge cake-like filling.
The version we’re daring you to make is a combination of the two: a sweet almond-flavored Shortcrust pastry, frangipane and jam.
Like many regional dishes there’s no “one way” to make a Bakewell Tart or Pudding, but most of today’s versions fall within one of two types. The first is the “pudding” where a layer of jam is covered by an almondy pastry cream and baked in puff pastry. The second is the “tart” where a rich Shortcrust pastry holds jam and an almondy sponge cake-like filling.
Thanks to Jasmine of Confessions of a Cardamom Addict and Aneemarie of Ambrosia and Nectar who chose such a delicious and classic English treat. What a fun challenge this was!

Dough recipe for 9 inch pie:
225g (8oz) all purpose flour
30g (1oz) sugar
2.5ml (½ tsp) salt
110g (4oz) unsalted butter, cold (frozen is better)
2 (2) egg yolks
2.5ml (½ tsp) almond extract (optional)
15-30ml (1-2 Tbsp) cold water
Sift together flour, sugar and salt. Grate butter into the flour mixture, using the large hole-side of a box grater. Using your finger tips only, and working very quickly, rubs the fat into the flour until the mixture resembles bread crumbs. Set aside.
Lightly beat the egg yolks with the almond extract (if using) and quickly mix into the flour mixture. Keep mixing while dribbling in the water, only adding enough to form cohesive and slightly sticky dough.
Form the dough into a disc, wrap in cling and refrigerate for at least 30 minutes.
Frangipane:
Prep time: 10-15 minutes Equipment needed: bowls, hand mixer, rubber spatula
125g (4.5oz) unsalted butter, softened
125g (4.5oz) icing sugar
3 (3) eggs
2.5ml (½ tsp) almond extract
125g (4.5oz) ground almonds
30g (1oz) all purpose flour
Cream butter and sugar together for about a minute or until the mixture is primrose in colour and very fluffy. Scrape down the side of the bowl and add the eggs, one at a time, beating well after each addition. The batter may appear to curdle. In the words of Douglas Adams: Don’t panic. Really. It’ll be fine. After all three are in, pour in the almond extract and mix for about another 30 seconds and scrape down the sides again. With the beaters on, spoon in the ground nuts and the flour. Mix well. The mixture will be soft, keep it’s slightly curdled look (mostly from the almonds) and retain its pallid yellow colour.


Chilled Tart Shells ready for the OvenSour Cherry & Pear Jam is used for stuffing


Fragipane topping over the jam


Dozen 4" tarts & dozen 8" tarts were baked for the market


Tasty and elegant Tart, easy to prepare with a beautiful dough base


A nice color combination

I will definetley make this tart again